Craft focused, conversion-driven pages with ease to capture and nurture more leads.


SendX makes it simple to create landing pages that drive action and boost your marketing results effortlessly.
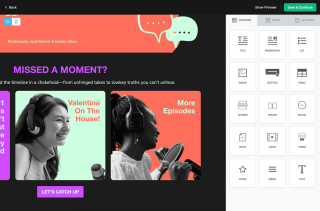
Build and launch with our intuitive editor. No coding required, just create and convert.
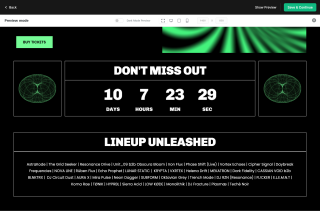
Use built-in tools like countdown timers to create urgency and drive more actions.
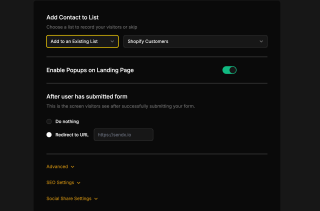
Automatically tag and nurture your leads into loyal customers with seamless workflows.
SendX landing pages streamline the process of converting visitors into loyal customers, maximizing your marketing efforts effortlessly.
Drag and drop elements to create compelling pages that capture and convert traffic seamlessly.
Use tools designed to grab attention and prompt action without the hassle of excessive configurations.
Automate lead tagging and immediate drip sequence enrollment to ensure no lead slips through the cracks.
Everything you need to know about SendX and our services. Last updated June 2026.
Creating a landing page is simple with our drag-and-drop editor. Choose a template, customize your content, and launch without a hitch.
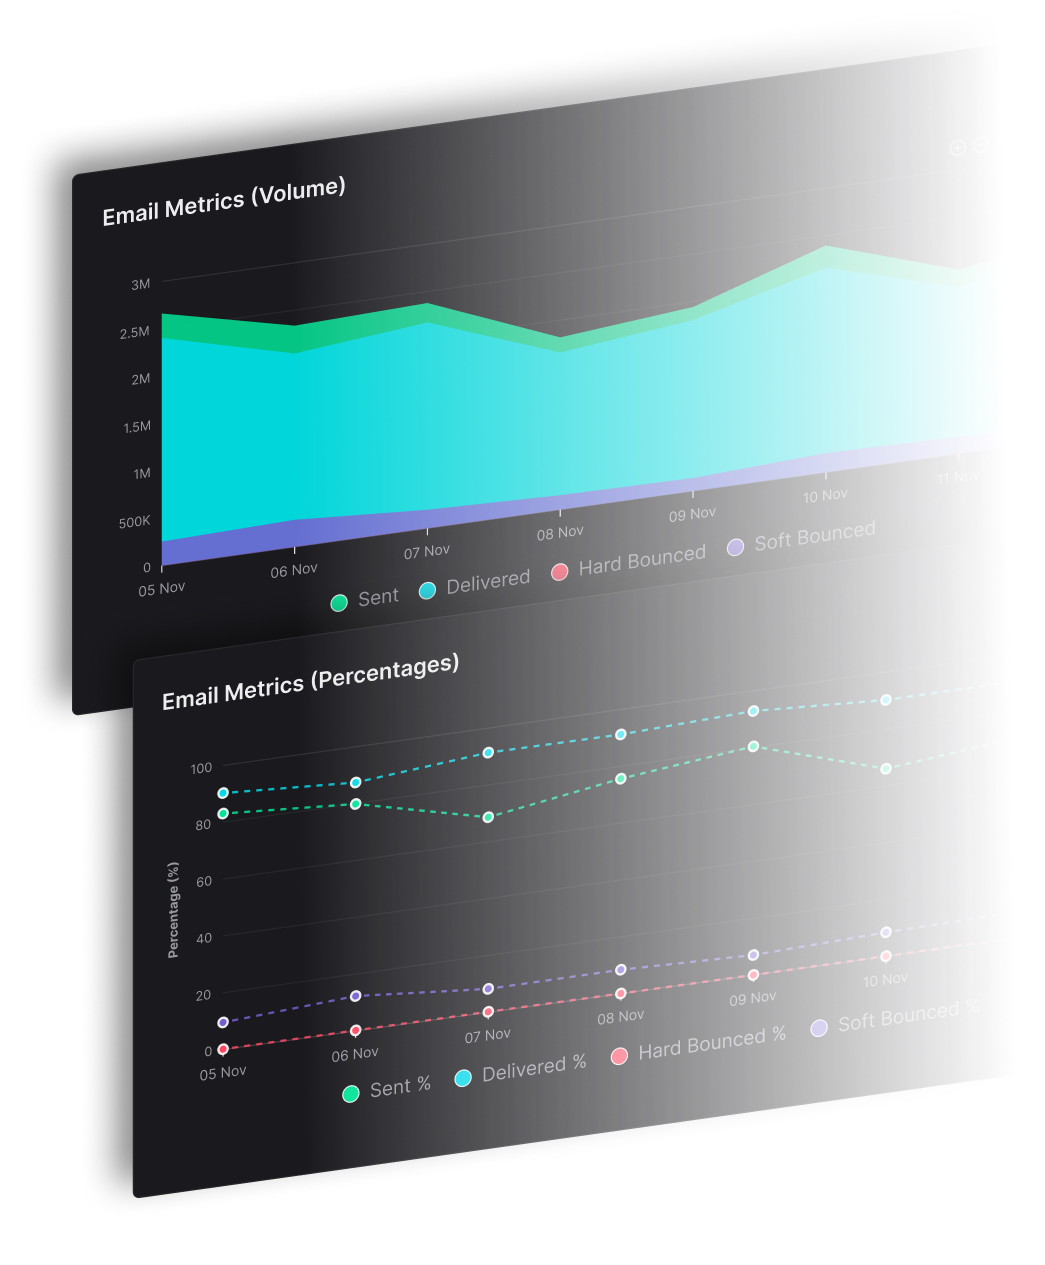
Absolutely! Integrate your favorite analytics tools like Google Analytics to monitor and optimize your page’s performance.
Landing pages capture leads that can be automatically tagged and added to email drip sequences for ongoing engagement and nurturing.
Yes, importing your contacts is easy. You can upload a CSV file with your subscriber lists, and our system will securely import them. We also help ensure a smooth transition by guiding you through the process of warming up your sending domain to maintain high deliverability.
Absolutely. SendX is built to connect with your existing marketing stack. We offer native integrations with many popular platforms like WordPress, Stripe, and PayPal. For everything else, you can use our Zapier integration to connect with over 3000+ apps or use our API for custom solutions.
Still have questions? We're here to help.
Join 3,000+ businesses that have sent over 4.4 billion emails through SendX — with 95–98% inbox placement, unlimited sends, and 24/7 live support on every plan.


Improve your campaigns by testing different emails with A/B Testing and hit the mark every time.
Automatically ramp sending volume to earn a rock‑solid sender reputation—no spreadsheets required.
Write, publish, and track articles without leaving SendX—turn readers into subscribers in minutes.
Filter out security‑scanner noise and see the clicks that actually matter.
Auto‑expire unsent emails so your audience only sees timely, relevant messages.
Give every campaign its own reply‑to address and make sure answers land in the right inbox—every time.