A Step-By-Step Guide To Creating A Content Upgrade Pop-Up in SendX.
By the end of this guide, you will be able to effortlessly create content upgrade pop-ups all set to add into your content pages to collect some awesome leads! We will be covering:
Introduction to Content Upgrade Pop-Ups
Making a Content Upgrade Pop-Up from Scratch
Customizing the Pop-Up to Suit Your Needs
Setting it up to Display on your Website
Introduction To Content Upgrade Pop-Ups
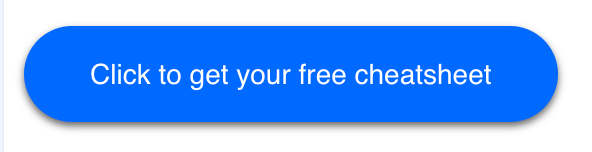
Content Upgrade Pop-Ups are Pop-Ups that integrate within your content and show up as a link inside your blog or your landing page. These are extremely useful when you have a specific lead magnet related to your content and would like to give it out at a specific point. It appears as a clickable button like this:
Making a Content Upgrade Pop-Up From Scratch
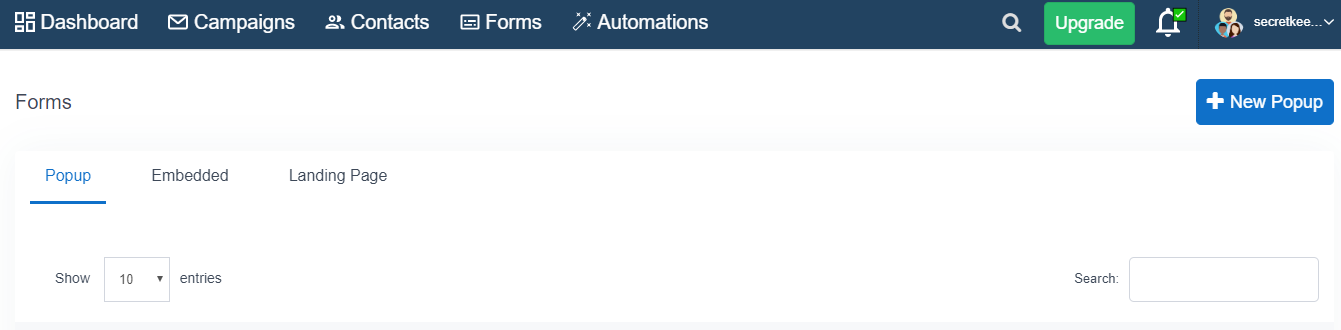
Go to Forms + Pop-up > New Popups.
Under the Basic tab, you can add a Name .
Then, under Add Contact to List, choose a suitable option. If you want to add leads from the exit intent pop-up to an already existing list, choose Add to an Existing List, and choose the List you want to add the leads to. Otherwise, choose Add to Auto-Created List, and SendX will automatically create a new list. with leads collected through that pop-up. Choosing No action required will not add the leads to any list.
Under the Basic option, set the Pop-Up type to Email Collect to collect information or Call To Action if you want to drive the user to take a specific action.
Go to content and choose a Theme of your choice and customize the colors of various buttons in that theme.
Choose the Animation type you want from the dropdown menu, and set the Background Opacity using the slider below.
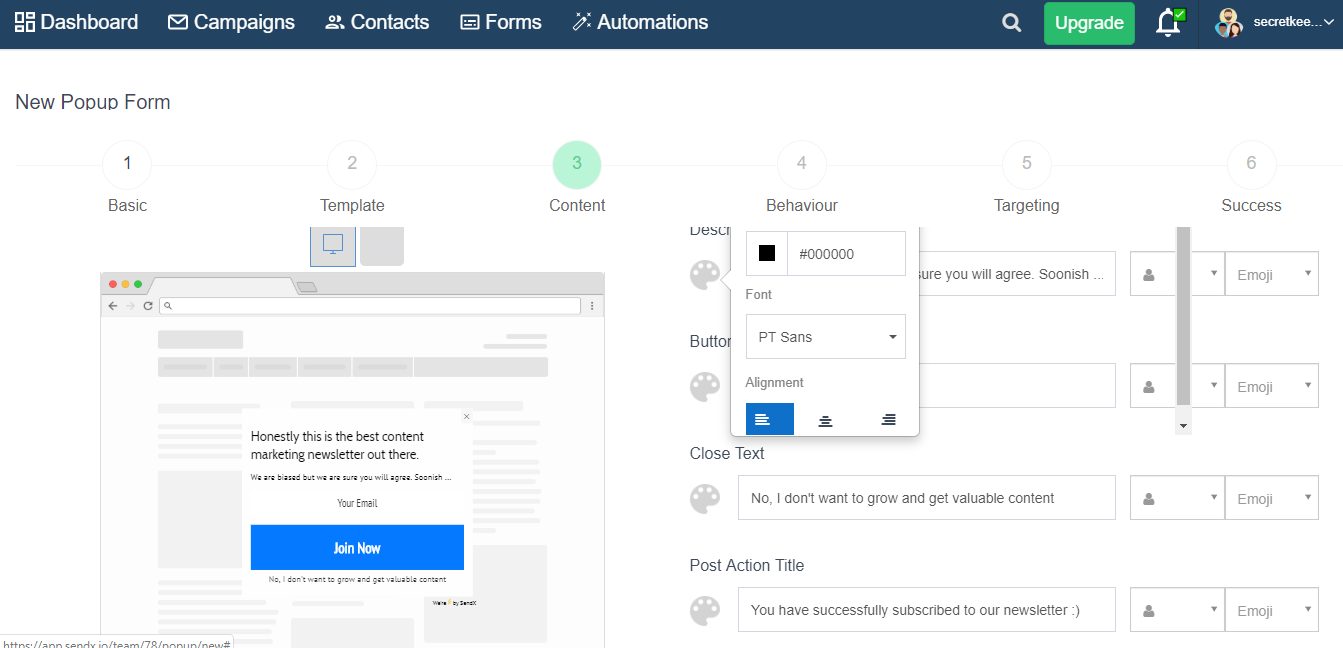
Customizing the Content of the Pop-Up
SendX allows you to customize the pop-up you create to best suit you and your business. This ensures maximum leads and a better relationship between you and your clients.
Go to the Content tab in the New Popup screen and add a suitable Title, Font Type and Font size.
Similarly, add an appropriate text, font type and size under Description and Button Text.

Under Fields, choose which field you want to add depending on the information you want the potential lead to give you. Click the Add Field button to add multiple fields.
Choose an image below or click Upload Image to add an image of your own. Uncheck Add Image if you don't want to add any image to your pop-up.
Setting It Up To Display On Your Website
To set your Pop-Up up to be a Content Upgrade pop-up, we need to set the Content Upgrade button up to show up on your screen.
Go to the Behaviour tab.
Check the box where it says When User Clicks On Link (Content Upgrade)
Copy the piece of code generated.
Paste that piece of code in the HTML page of your blog post or landing page where you want the Content Upgrade Button to appear.
Click Submit to set the pop-up.
Congratulations! You're all set to collect highly targeted leads within your content!