How to push contacts added via ConvertBox forms to SendX.
This article walks you through enabling ConvertBox integration with your SendX account.
You will be able to collect leads from your ConvertBox forms and they will automatically be added to SendX. You will also be able to start drip sequences or send one-off email campaigns to these leads. The main steps are as follows:
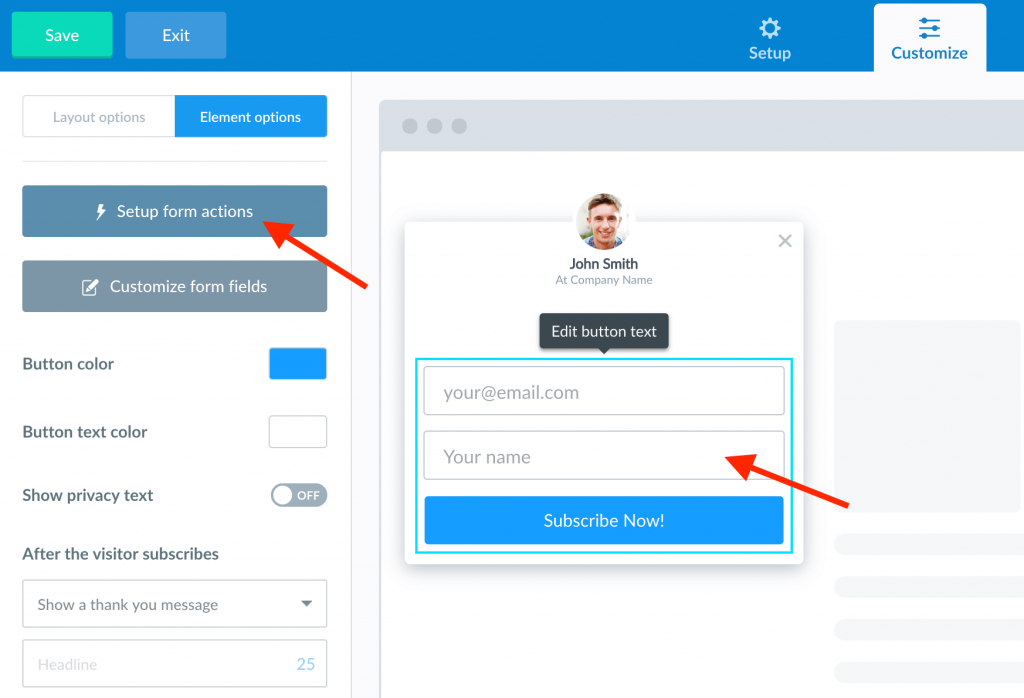
Edit your ConvertBox and select the form element you want to use webhooks with. Then on the left sidebar select the Setup form actions button.
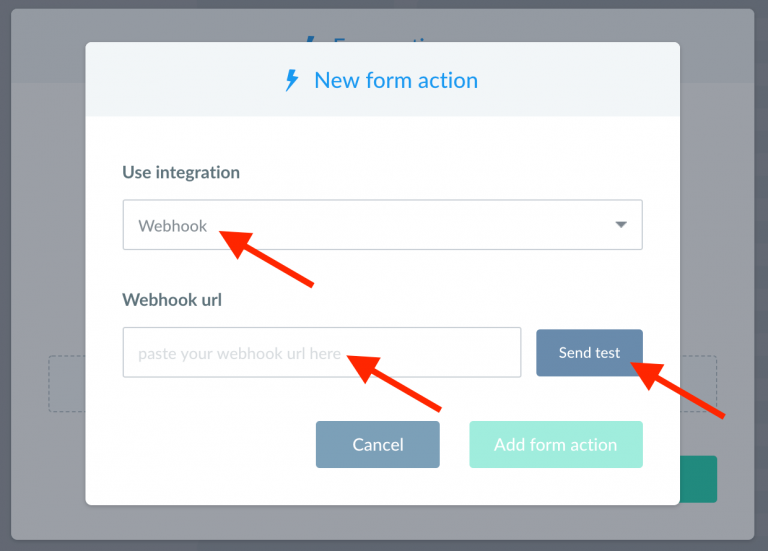
Select the Add a new form action button.

On the Use integration option select Webhooks then paste your webhook URL into the Webhook url field. Your webhook URL is https://app.sendx.io/api/v1/integration/convertbox/team/<team id> . You can find your team ID under Settings > Site Setup > Team ID. Now you can click the Send test button to send test data to your webhook URL for all the fields currently on your ConvertBox. Wait for the test to send (usually takes 1-3 seconds) and then click Add form Action
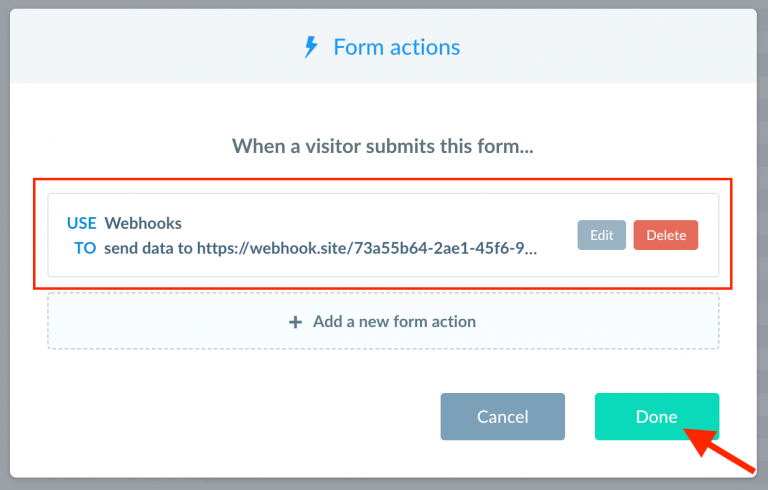
Your new Webhook action will now appear in your list of actions for this form. Click Done to close the Form actions modal and don’t forget to Save the changes to your ConvertBox in the editor.
You can now go and check your SendX account. You will see a new contact being created in SendX. The contact will have via_convertbox tag added to it.
All mapped fields will appear as contact properties (First Name, Last Name, Email) or as custom fields.
Additional information, such as the page from which details were submitted, IP data, and variation, are also captured by the SendX system.