Woo-Commerce Integration Integrating Woo-Commerce e-commerce platform with SendX Varun Jain
This article walks your through enabling the WooCommerce integration in your SendX account. The main steps are as follows:
-
Enabling WebHooks in Woo-Commerce
-
Specify events like order created or new customer created which you want to sync with SendX
At the end of this integration:
-
SendX contact is created as soon as customer is created on your Woo-Commerce store
-
You can view all order & product details which a customer placed on Woo-Commerce in SendX
-
Track life time value on per Woo-Commerce customer on SendX
-
Segment Woo-Commerce customers based on which products or categories they have purchased
-
Segment Woo-Commerce customers based on whether they avail coupons or not
-
Segment Woo-Commerce customers based on whether they have purchased specific products in specific time frame
So let's get started:
-
Click on Settings > Advanced
-
Click on Webhooks tabs

-
Give webhook a name such as Order Created, change status to Active, choose topic or event from WooCommerce which you want to push to SendX such as Order created, provide a delivery url which will be of format: https://app.sendx.io/api/v1/integration/woocommerce/team/<teamid>

-
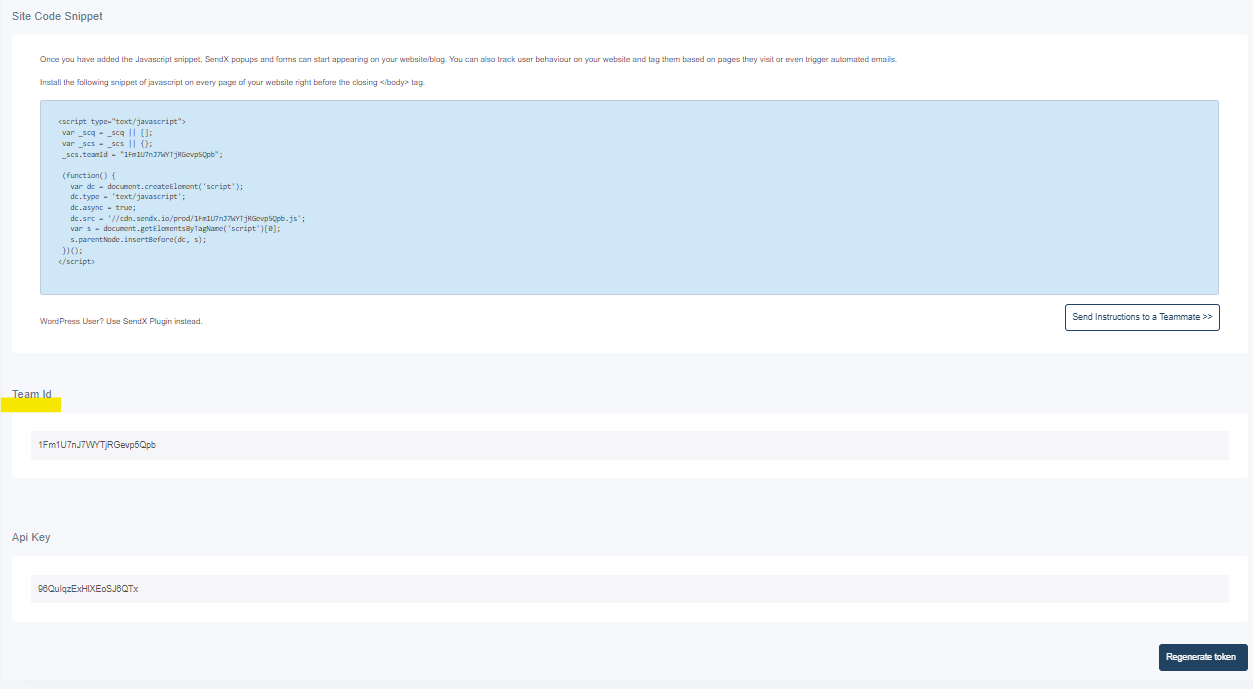
You can find your account's team id by logging into SendX app > Clicking on Settings and copying Team Id value.
-
If everything goes well then after clicking on Save Webhook you should see a Webhook updated successfully message.
-
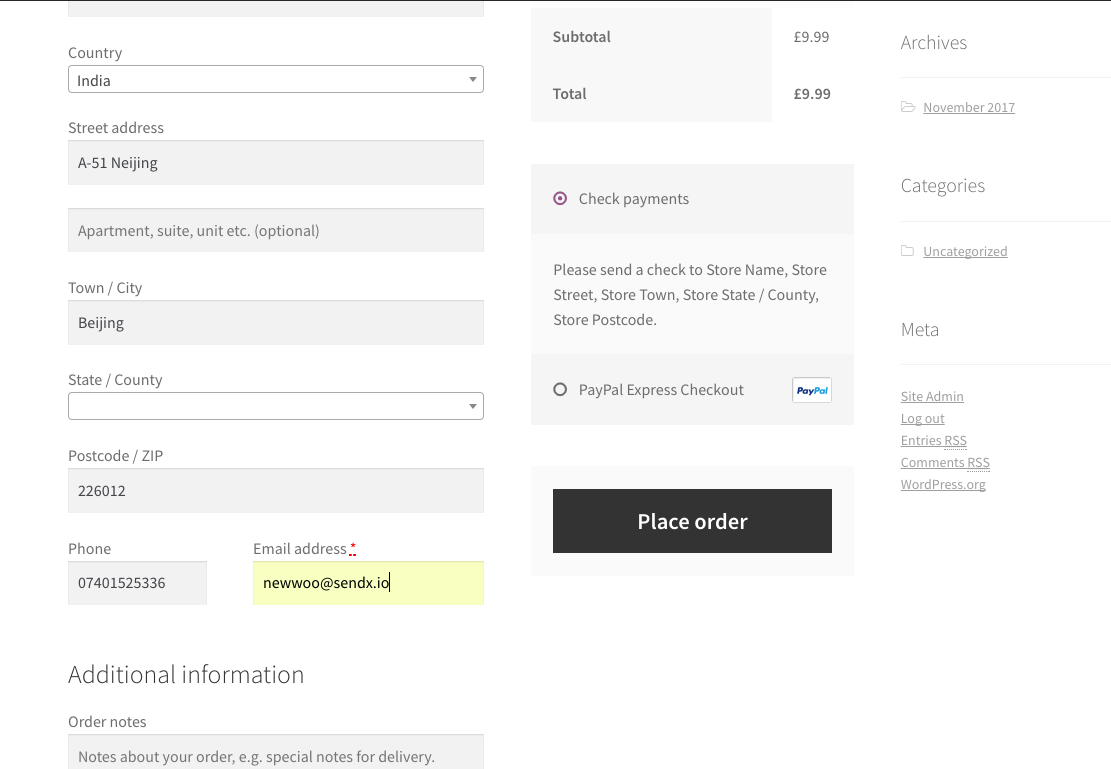
To verify, let's quickly order a product from your Woo-Commerce store with a new customer email id
-
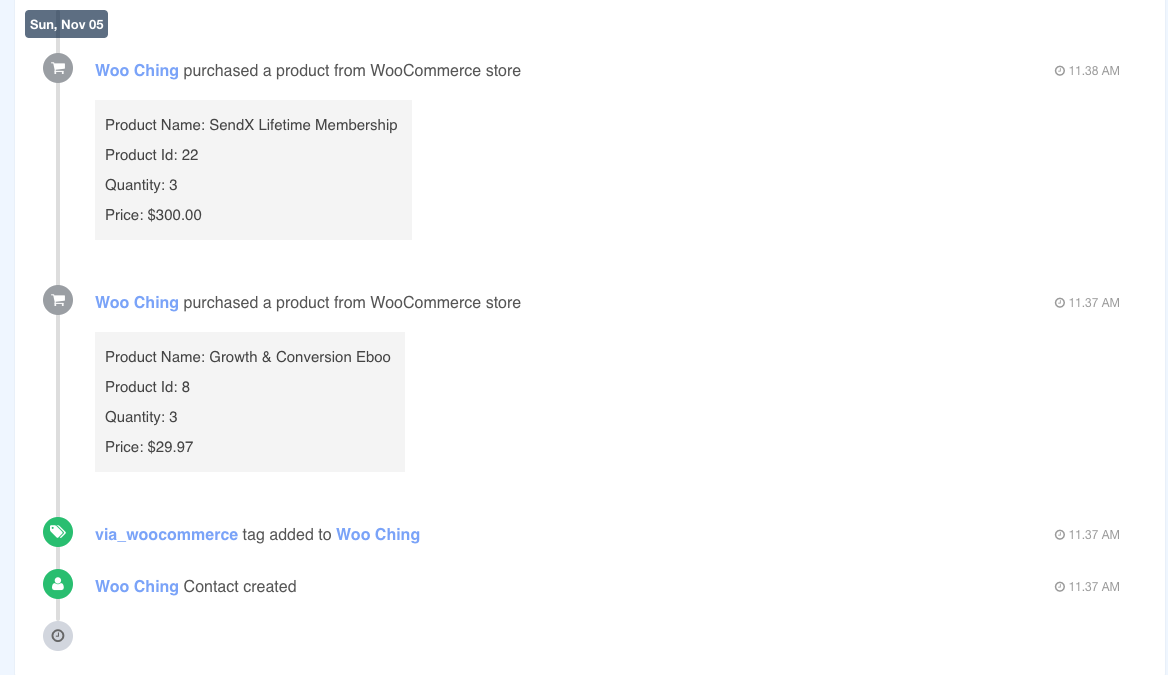
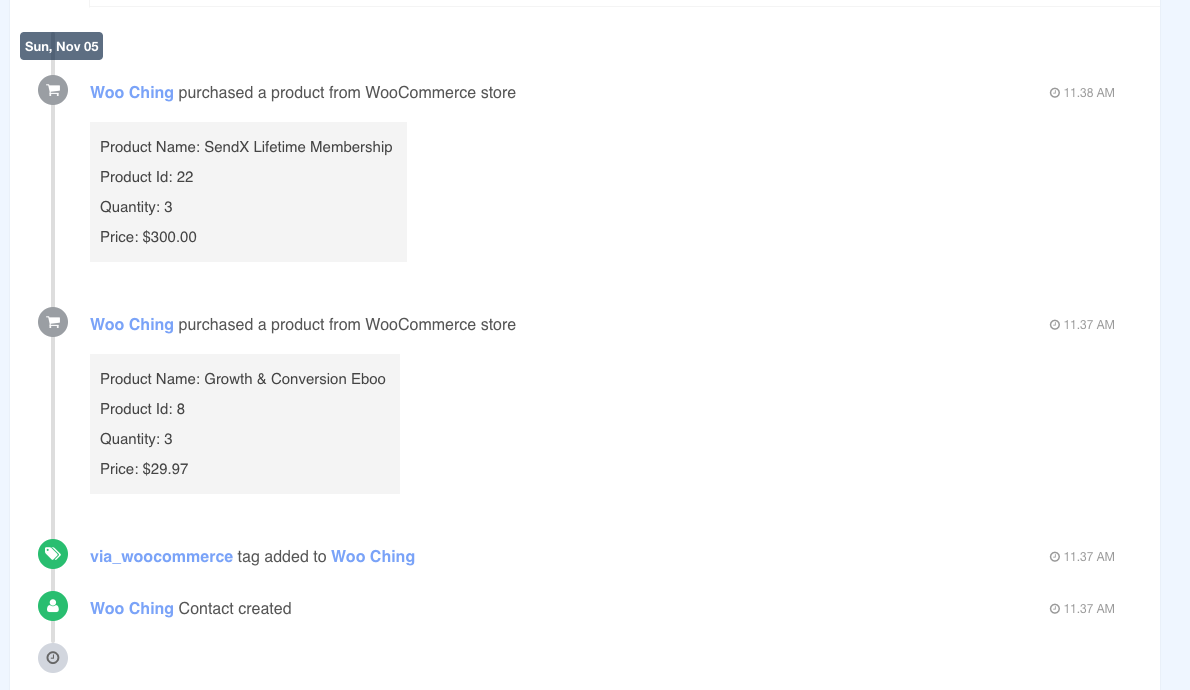
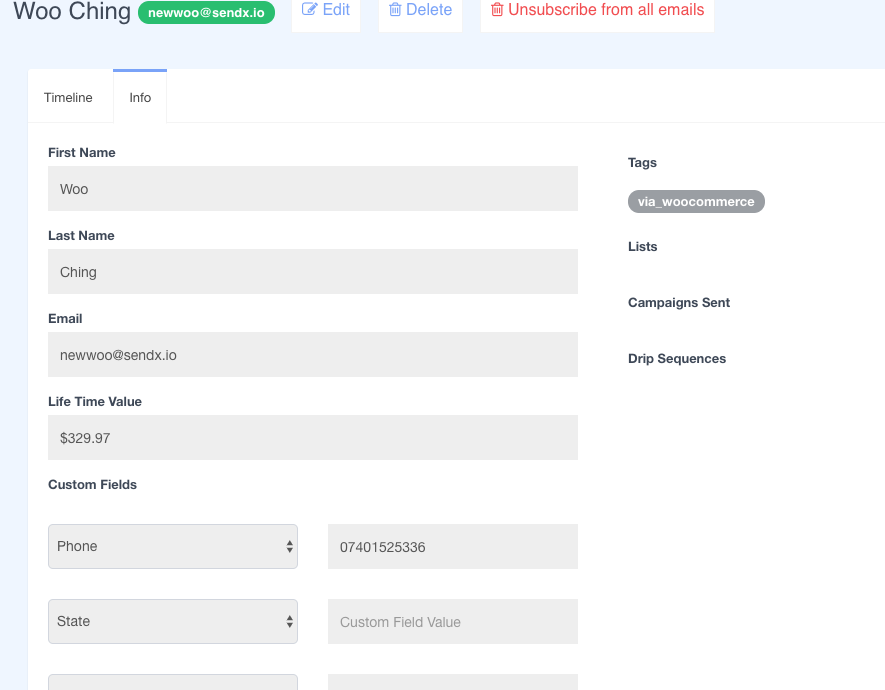
After placing the order you should find a new contact with the same email and name has been created on SendX with billing information. In contact's timeline you will find details of the products he / she purchased on your Woo-Commerce store
-
SendX automatically adds a tag called via_woocommerce for all customers who got created or update via Woo-Commerce i.e they made a purchase. Also you will find the life time value of a contact based on all the past purchases he / she has made
-
That's it. You are good to go now. In remaining sections we will see how to sync initial Woo-Commerce data to SendX, how to create segments based on LTV ( life time value ), segments based on products purchased, segments based on last buy pattern, coupons applied etc. so to increase revenue & profit of your Woo-Commerce store.
Instructions for SendX V2
This article walks your through enabling the WooCommerce integration in your SendX account. The main steps are as follows:
-
Enabling WebHooks in Woo-Commerce
-
Specify events like order created or new customer created which you want to sync with SendX
At the end of this integration:
-
SendX contact is created as soon as customer is created on your Woo-Commerce store
-
You can view all order & product details which a customer placed on Woo-Commerce in SendX
-
Track life time value on per Woo-Commerce customer on SendX
-
Segment Woo-Commerce customers based on which products or categories they have purchased
-
Segment Woo-Commerce customers based on whether they avail coupons or not
-
Segment Woo-Commerce customers based on whether they have purchased specific products in specific time frame

So let's get started:
-
Click on Settings > Advanced
-
Click on Webhooks tabs

-
Give webhook a name such as Order Created, change status to Active, choose topic or event from WooCommerce which you want to push to SendX such as Order created, provide a delivery url which will be of format: https://app.sendx.io/api/v1/integration/woocommerce/team/<teamid>

-
You can find your account's team API key by logging into SendX app > Clicking on Settings and copying Team API Key value.

-
If everything goes well then after clicking on Save Webhook you should see a Webhook updated successfully message.
-
To verify, let's quickly order a product from your Woo-Commerce store with a new customer email id

-
After placing the order you should find a new contact with the same email and name has been created on SendX with billing information. In contact's timeline you will find details of the products he / she purchased on your Woo-Commerce store

-
SendX automatically adds a tag called via_woocommerce for all customers who got created or update via Woo-Commerce i.e they made a purchase. Also you will find the life time value of a contact based on all the past purchases he / she has made

-
That's it. You are good to go now. In remaining sections we will see how to sync initial Woo-Commerce data to SendX, how to create segments based on LTV ( life time value ), segments based on products purchased, segments based on last buy pattern, coupons applied etc. so to increase revenue & profit of your Woo-Commerce store.
Did this answer your question?
