
By the end of this short guide, you will be able to effortlessly create segments, and get started with laser targeting your emails to improve your marketing efforts. Check out our brief guide on Segmentation if you're not familiar with how Segments work.
-
Create a new segment by going to the Contacts + Segments menu on the Topside pane of SendX. Click on New Segments.
-
Choose a suitable Name for your segments.
-
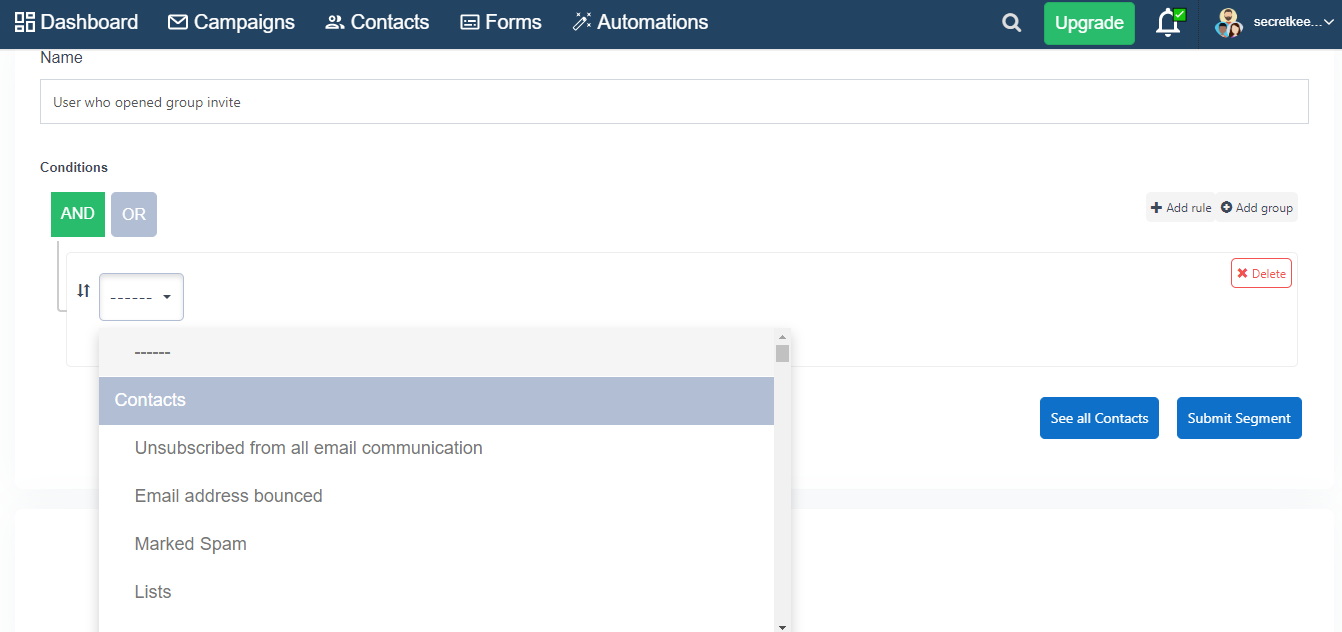
Choose your desired condition between AND and OR. If you select AND, the contact will have to meet all the conditions to be considered under that particular segment. If you select OR, the contact will have to meet any of the conditions to be considered under that particular segment.
-
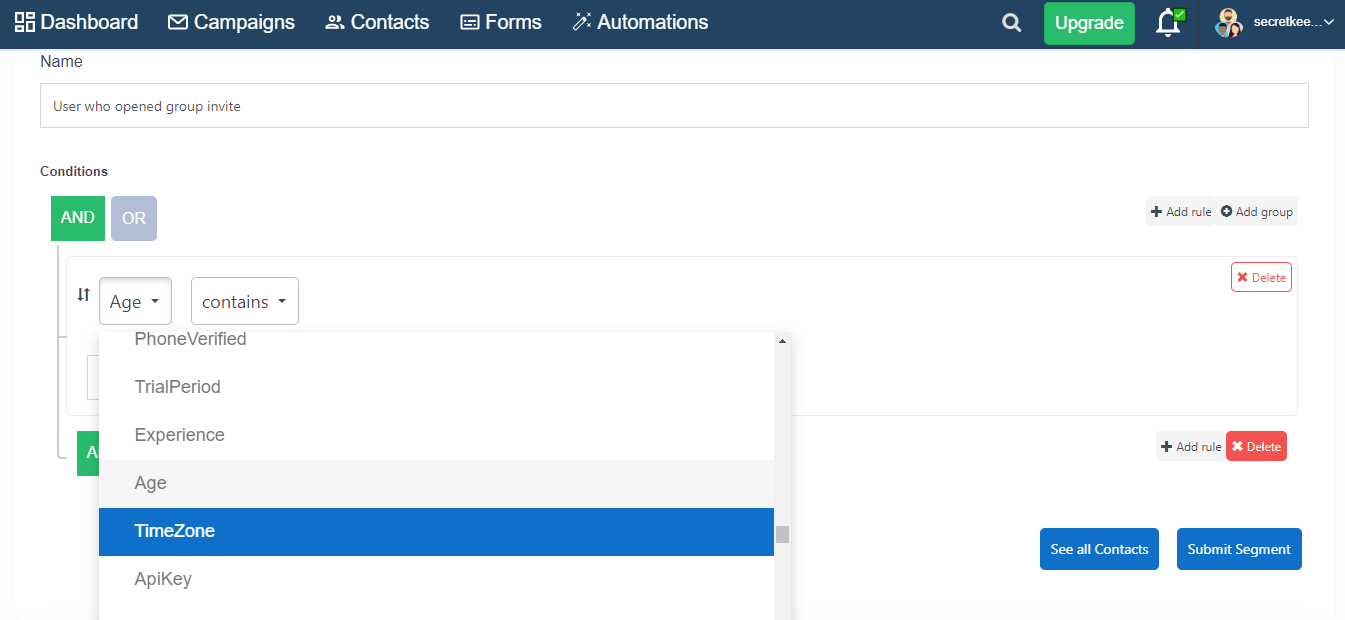
Open the drop drown menu and click on your desired field. Ex: Age
-
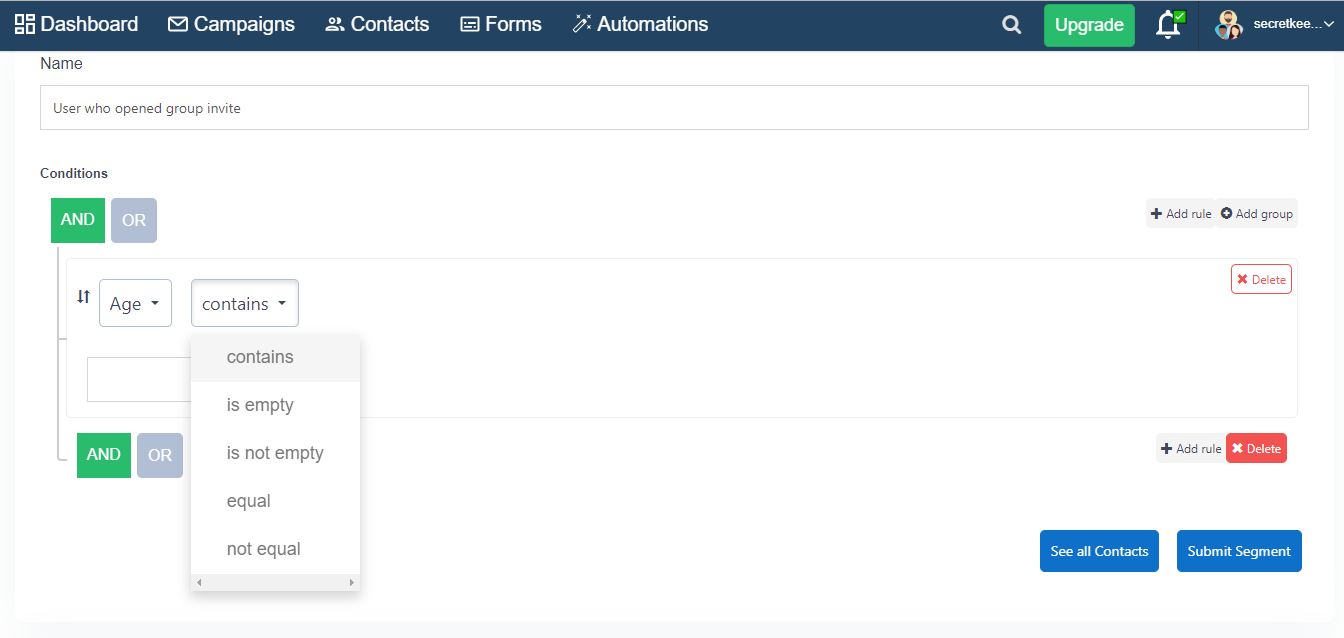
Choose the desired condition from the next drop-down menu. This condition will decide whether a particular value for that field will actually get segmented or not.
-
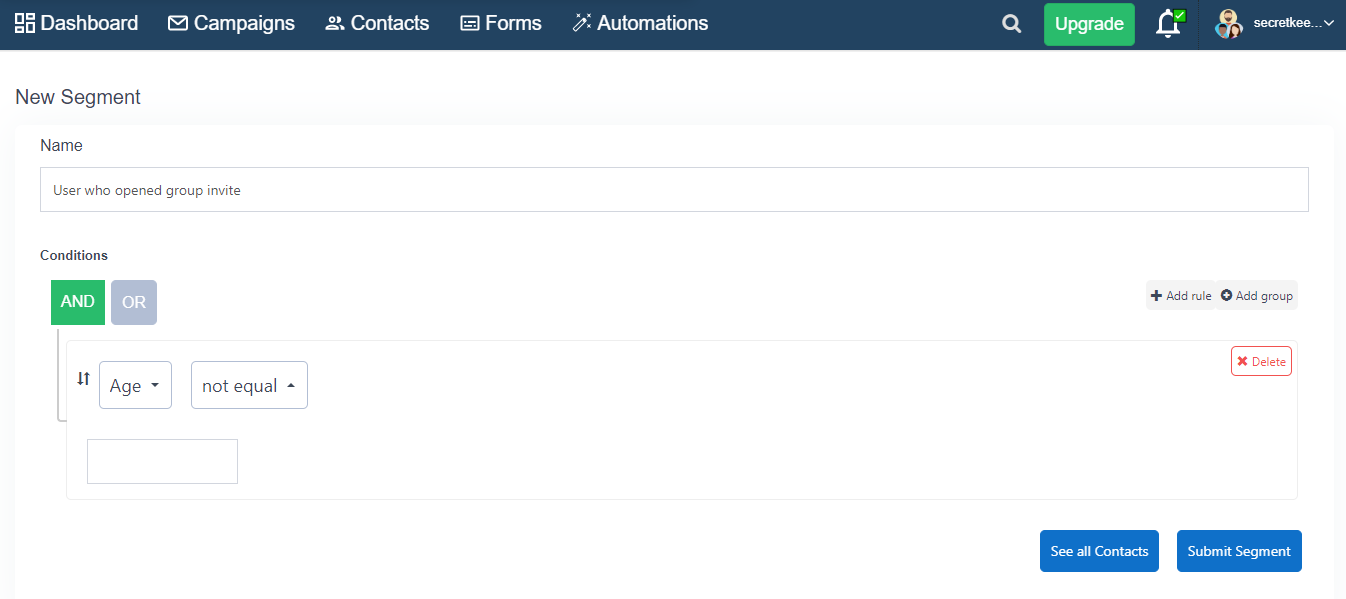
Add the value in the field below. When that value is met, the contact will be added to that particular segment. For ex: In the segment above, the users who opened a mail and are not 18 years old will be segmented.
-
Click Submit to save that segment.
And that's it! That's all you need to do to start creating your own segments in SendX.
Did this answer your question?