
Create a Segment with Date A Step-By-Step Guide To Creating A Segment With Date Varun Jain
Using Segmentation in SendX, you can quickly segment out people according to a specific date. You can set it so that the contacts with whom the associated date is less/more than the date set in the segment value field will be segmented separately. This is really useful for separating out older contacts, or if you want to run a special offer to subscribers of a particular duration of the month.
Creating a Custom Field of type Date
To create a new Custom Field of type Date:
Go to the Contacts menu from the Top side pane of SendX and scroll down.
Click on the New Custom Field button at the top.

Type the Name you want to give to the field, and then choose the type of field ie Date.
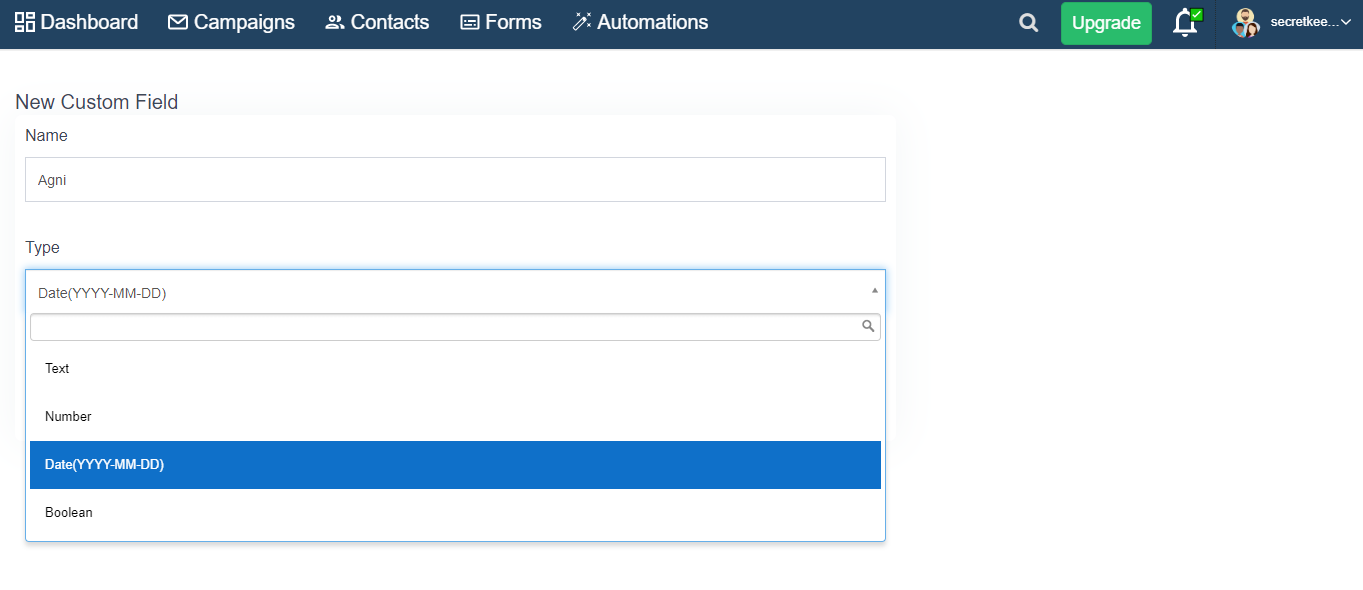
Click on Submit to create the field.
Creating A Segment Using Field Type Date
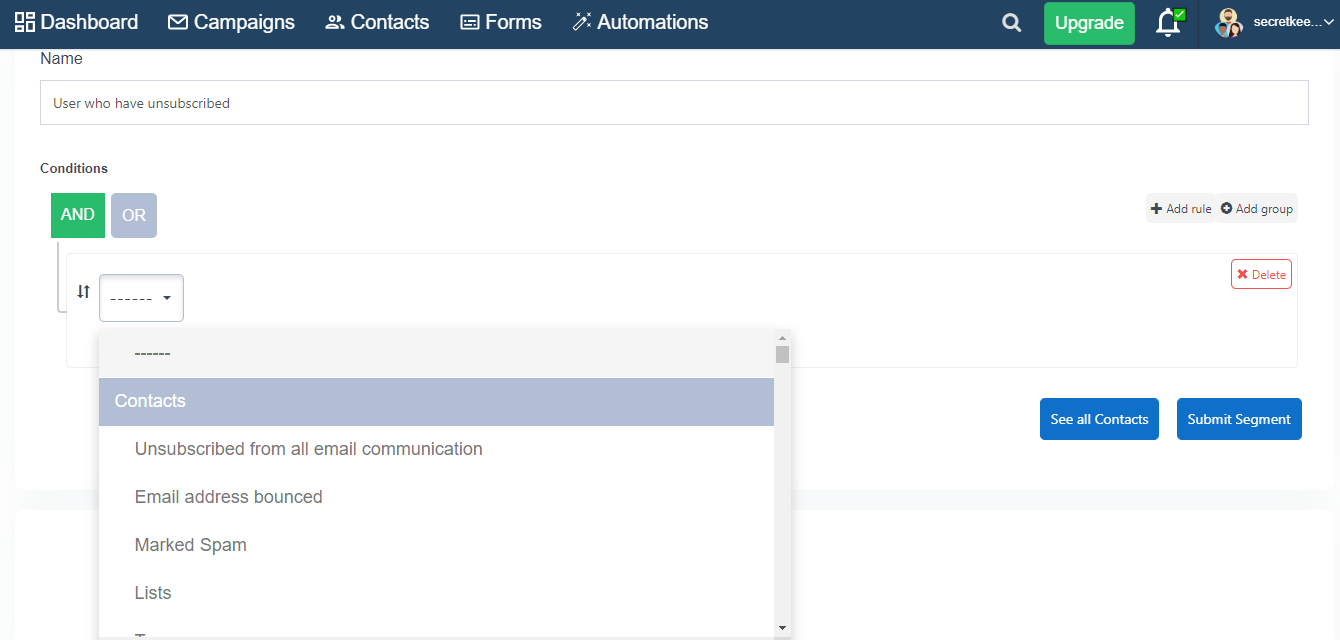
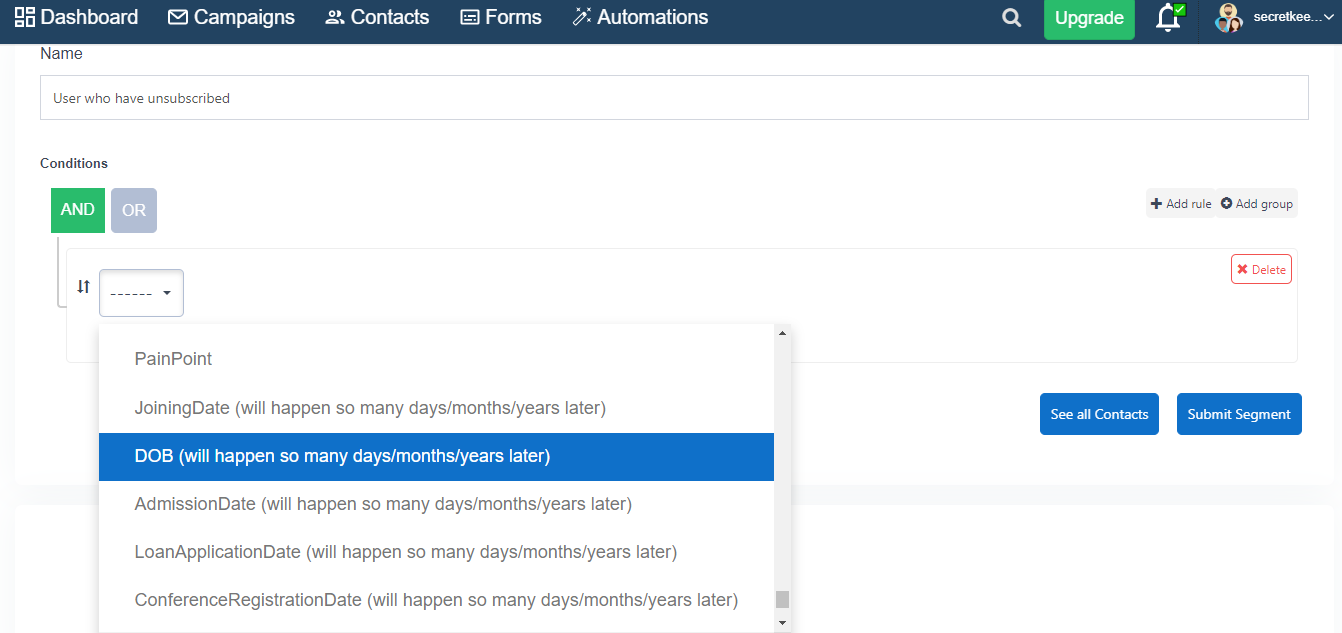
Create a new segment by going to the Contacts + Segments menu on the Top side pane of SendX. Click on New Segments.
Choose a suitable Name for your segments.
Choose your desired condition between AND and OR. If you select AND, the contact will have to meet all the conditions to be considered under that particular segment. If you select OR, the contact will have to meet any of the conditions to be considered under that particular segment.
Open the drop drown menu and click on your desired custom field. Ex: DOB
Add the value in the field below. When that value is met, the contact will be added to that particular segment. For ex: In the segment above, the users who opened a mail and did it 7 days before the date set (DOB) will be segmented.
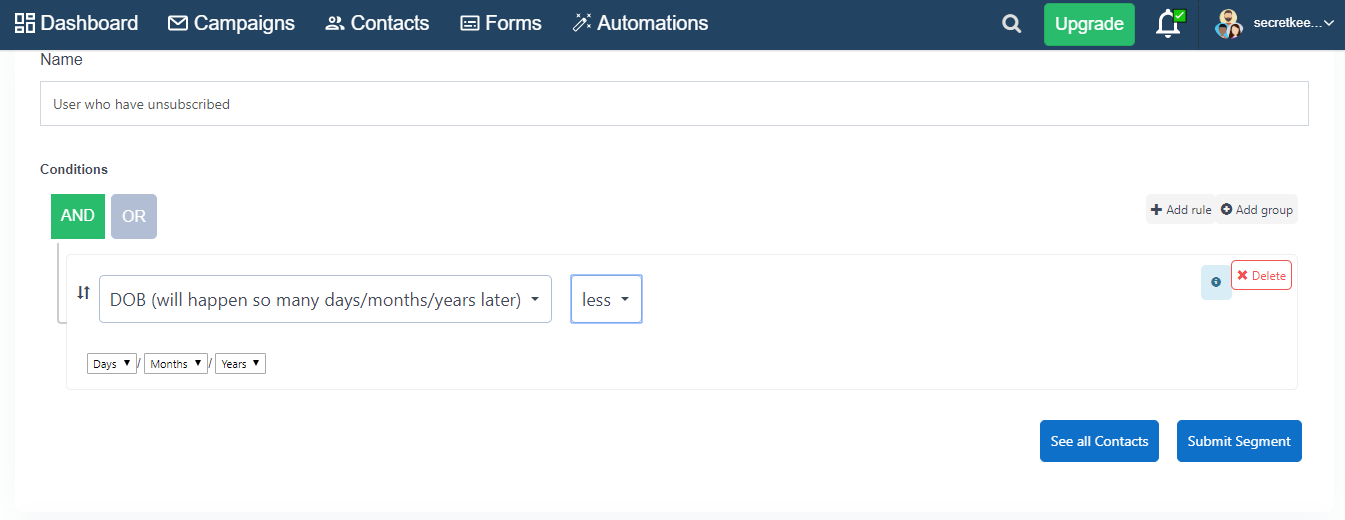
Click Submit to save that segment.
And that's it! That's all you need to do to start creating your own segments using field type date in SendX.